Event-Driven Architecture (EDA) is a design pattern where components communicate through events, which are messages that indicate something has occurred. This approach enhances scalability, flexibility, and responsiveness in applications. In this guide, we will walk you through implementing Event-Driven Architecture in .NET Core, providing a step-by-step approach to building a responsive, event-driven application.
Table of Contents
- Introduction to Event-Driven Architecture
- Setting Up Your Development Environment
- Creating the Solution and Projects
- Building Event Producers
- Creating Event Consumers
- Implementing Event Messaging
- Managing Event Storage
- Securing Your Event-Driven System
- Testing and Debugging
- Deploying Your Application
- Conclusion
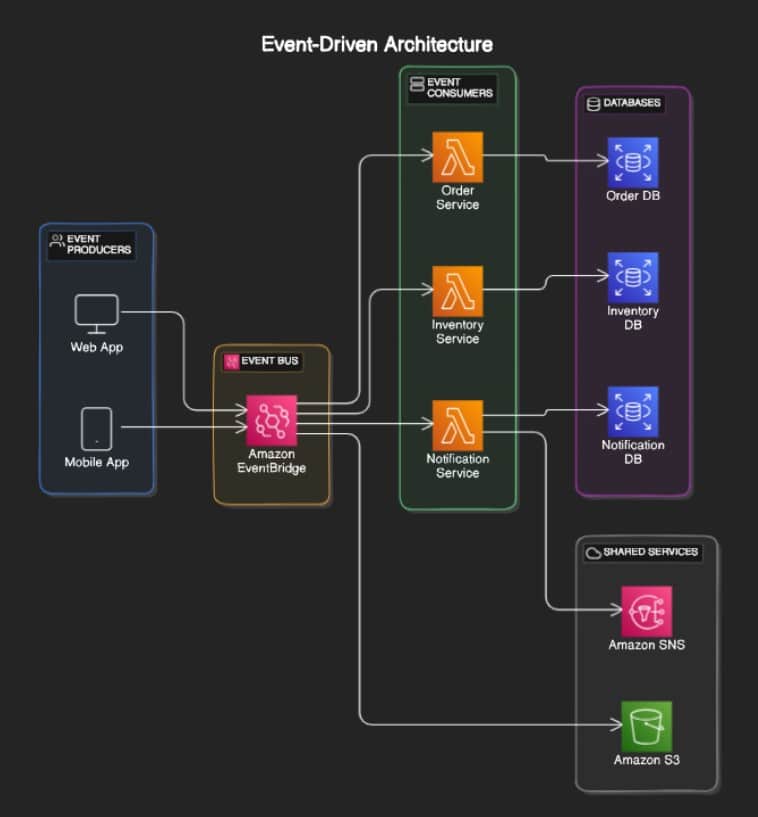
1. Introduction to Event-Driven Architecture
Event-Driven Architecture revolves around the concept of producing and consuming events. In an event-driven system, components interact by publishing events that signify changes or actions, and other components listen for these events and respond accordingly. This architecture promotes loose coupling and asynchronous processing, making it ideal for scalable and resilient systems.
2. Setting Up Your Development Environment
Ensure you have the following tools installed:
- .NET Core SDK
- Visual Studio or Visual Studio Code
- Docker (optional, for containerization)
- A message broker like RabbitMQ or Azure Service Bus (for event messaging)
3. Creating the Solution and Projects
Create a new .NET Core solution and projects for your event-driven components. Open your terminal or command prompt and run:
mkdir EventDrivenApp
cd EventDrivenApp
dotnet new sln

dotnet new webapi -o EventProducer
dotnet new webapi -o EventConsumer

dotnet sln add EventProducer/EventProducer.csproj
dotnet sln add EventConsumer/EventConsumer.csproj
4. Building Event Producers
An event producer generates and publishes events to a message broker. Let’s create a basic producer that emits events when a new product is added.
EventProducer Project:
- Open
EventProducer/EventProducer.csprojin your IDE. - Create a
Modelsfolder and add aProduct.csfile:
namespace EventProducer.Models
{
    public class Product
    {
        public int Id { get; set; }
        public string Name { get; set; }
        public decimal Price { get; set; }
    }
}
- Create a
Controllersfolder and add aProductsController.csfile:
using Microsoft.AspNetCore.Mvc;
using EventProducer.Models;
using System.Threading.Tasks;
using Microsoft.Extensions.Configuration;
using RabbitMQ.Client;
using System.Text;
using System.Text.Json;

namespace EventProducer.Controllers
{
    [ApiController]
    [Route("api/[controller]")]
    public class ProductsController : ControllerBase
    {
        private readonly IConfiguration _configuration;

        public ProductsController(IConfiguration configuration)
        {
            _configuration = configuration;
        }

        [HttpPost]
        public async Task<IActionResult> Post(Product product)
        {
            // Publish event to RabbitMQ
            var factory = new ConnectionFactory() { HostName = _configuration["RabbitMQ:HostName"] };
            using var connection = factory.CreateConnection();
            using var channel = connection.CreateModel();
            channel.QueueDeclare(queue: "productQueue", durable: false, exclusive: false, autoDelete: false, arguments: null);

            var message = JsonSerializer.Serialize(product);
            var body = Encoding.UTF8.GetBytes(message);

            channel.BasicPublish(exchange: "", routingKey: "productQueue", basicProperties: null, body: body);

            return CreatedAtAction(nameof(Post), new { id = product.Id }, product);
        }
    }
}
- Add RabbitMQ configuration in
appsettings.json:
"RabbitMQ": {
    "HostName": "localhost"
}
5. Creating Event Consumers
An event consumer listens for events from a message broker and processes them. Let’s create a basic consumer that handles product events.
EventConsumer Project:
- Open
EventConsumer/EventConsumer.csprojin your IDE. - Create a
Servicesfolder and add aProductEventService.csfile:
using RabbitMQ.Client;
using RabbitMQ.Client.Events;
using System;
using System.Text;
using System.Text.Json;
using System.Threading.Tasks;

namespace EventConsumer.Services
{
    public class ProductEventService
    {
        private readonly string _hostName;

        public ProductEventService(string hostName)
        {
            _hostName = hostName;
        }

        public void StartConsuming()
        {
            var factory = new ConnectionFactory() { HostName = _hostName };
            using var connection = factory.CreateConnection();
            using var channel = connection.CreateModel();
            channel.QueueDeclare(queue: "productQueue", durable: false, exclusive: false, autoDelete: false, arguments: null);

            var consumer = new EventingBasicConsumer(channel);
            consumer.Received += async (model, ea) =>
            {
                var body = ea.Body.ToArray();
                var message = Encoding.UTF8.GetString(body);
                var product = JsonSerializer.Deserialize<Product>(message);

                // Process the product event (e.g., log, save to database)
                Console.WriteLine($"Received product event: {product.Name}");
                await Task.CompletedTask;
            };

            channel.BasicConsume(queue: "productQueue", autoAck: true, consumer: consumer);
        }
    }
}
- Configure and start the consumer in
Startup.cs:
public void Configure(IApplicationBuilder app, IWebHostEnvironment env)
{
    // Other configurations

    var productEventService = new ProductEventService(Configuration["RabbitMQ:HostName"]);
    productEventService.StartConsuming();
}
6. Implementing Event Messaging
To facilitate communication between event producers and consumers, we’ll use RabbitMQ, a popular message broker that supports various messaging protocols. Here’s how to set up RabbitMQ and integrate it with your .NET Core applications.
Setting Up RabbitMQ
Install RabbitMQ: You can download and install RabbitMQ from the official RabbitMQ website. Alternatively, use Docker to run RabbitMQ:
docker run -d --name rabbitmq -p 5672:5672 -p 15672:15672 rabbitmq:managementThis command runs RabbitMQ with the management plugin, which can be accessed via http://localhost:15672/ with the default username and password both set to guest.
Add RabbitMQ Configuration: In both the EventProducer and EventConsumer projects, configure RabbitMQ settings in the appsettings.json file:
"RabbitMQ": {
    "HostName": "localhost"
}
Add RabbitMQ Client NuGet Package: Add the RabbitMQ client library to both projects:
dotnet add package RabbitMQ.Client7. Managing Event Storage
Event storage involves keeping track of events, which can be important for auditing or replaying events. For simplicity, we’ll use a basic in-memory store in this example, but in a production environment, you might use a database or dedicated event store.
In-Memory Event Storage
Add an in-memory storage class to the EventConsumer project to store received events:
Create a Storage Service:
namespace EventConsumer.Services
{
    public class InMemoryEventStore
    {
        private readonly List<Product> _events = new List<Product>();

        public void AddEvent(Product product)
        {
            _events.Add(product);
        }

        public IEnumerable<Product> GetAllEvents()
        {
            return _events;
        }
    }
}
Register and Use the Storage Service: Update the Startup.cs file to register this service and use it in the ProductEventService:
public void ConfigureServices(IServiceCollection services)
{
    services.AddSingleton<InMemoryEventStore>();
    services.AddTransient<ProductEventService>(provider =>
        new ProductEventService(Configuration["RabbitMQ:HostName"], provider.GetService<InMemoryEventStore>()));
}
Update the ProductEventService to use the InMemoryEventStore:
public class ProductEventService
{
    private readonly string _hostName;
    private readonly InMemoryEventStore _eventStore;

    public ProductEventService(string hostName, InMemoryEventStore eventStore)
    {
        _hostName = hostName;
        _eventStore = eventStore;
    }

    public void StartConsuming()
    {
        var factory = new ConnectionFactory() { HostName = _hostName };
        using var connection = factory.CreateConnection();
        using var channel = connection.CreateModel();
        channel.QueueDeclare(queue: "productQueue", durable: false, exclusive: false, autoDelete: false, arguments: null);

        var consumer = new EventingBasicConsumer(channel);
        consumer.Received += (model, ea) =>
        {
            var body = ea.Body.ToArray();
            var message = Encoding.UTF8.GetString(body);
            var product = JsonSerializer.Deserialize<Product>(message);

            // Store the product event
            _eventStore.AddEvent(product);
            Console.WriteLine($"Received product event: {product.Name}");
        };

        channel.BasicConsume(queue: "productQueue", autoAck: true, consumer: consumer);
    }
}
8. Securing Your Event-Driven System
Securing an event-driven system involves ensuring that only authorized components can access your events and services. Here’s how to add basic security to your .NET Core application.
Securing APIs with JWT
Add JWT Authentication to EventProducer: Install the required NuGet packages:
dotnet add package Microsoft.AspNetCore.Authentication.JwtBearerConfigure JWT authentication in Startup.cs:
public void ConfigureServices(IServiceCollection services)
{
    services.AddControllers();
    services.AddAuthentication(JwtBearerDefaults.AuthenticationScheme)
        .AddJwtBearer(options =>
        {
            options.TokenValidationParameters = new TokenValidationParameters
            {
                ValidateIssuer = true,
                ValidateAudience = true,
                ValidateLifetime = true,
                ValidateIssuerSigningKey = true,
                ValidIssuer = Configuration["Jwt:Issuer"],
                ValidAudience = Configuration["Jwt:Issuer"],
                IssuerSigningKey = new SymmetricSecurityKey(Encoding.UTF8.GetBytes(Configuration["Jwt:Key"]))
            };
        });
}

public void Configure(IApplicationBuilder app, IWebHostEnvironment env)
{
    if (env.IsDevelopment())
    {
        app.UseDeveloperExceptionPage();
    }
    else
    {
        app.UseExceptionHandler("/Home/Error");
        app.UseHsts();
    }

    app.UseHttpsRedirection();
    app.UseStaticFiles();

    app.UseRouting();
    app.UseAuthentication();
    app.UseAuthorization();

    app.UseEndpoints(endpoints =>
    {
        endpoints.MapControllers();
    });
}
Add the JWT settings to appsettings.json:
"Jwt": {
    "Key": "YourSecretKeyHere",
    "Issuer": "YourIssuer"
}
Generate and Use JWT Tokens: In your authentication controller (e.g., AuthController), generate JWT tokens for authenticated users:
[ApiController]
[Route("api/[controller]")]
public class AuthController : ControllerBase
{
    private readonly IConfiguration _configuration;

    public AuthController(IConfiguration configuration)
    {
        _configuration = configuration;
    }

    [HttpPost("token")]
    public IActionResult GetToken([FromBody] LoginModel login)
    {
        if (login.Username == "user" && login.Password == "password")
        {
            var claims = new[]
            {
                new Claim(JwtRegisteredClaimNames.Sub, login.Username),
                new Claim(JwtRegisteredClaimNames.Jti, Guid.NewGuid().ToString())
            };

            var key = new SymmetricSecurityKey(Encoding.UTF8.GetBytes(_configuration["Jwt:Key"]));
            var creds = new SigningCredentials(key, SecurityAlgorithms.HmacSha256);

            var token = new JwtSecurityToken(
                issuer: _configuration["Jwt:Issuer"],
                audience: _configuration["Jwt:Issuer"],
                claims: claims,
                expires: DateTime.Now.AddMinutes(30),
                signingCredentials: creds);

            return Ok(new
            {
                Token = new JwtSecurityTokenHandler().WriteToken(token)
            });
        }
        return Unauthorized();
    }
}
Ensure your APIs require authentication by adding the [Authorize] attribute to controllers or actions.
9. Testing and Debugging
Test the event producer by sending HTTP POST requests to add products, and verify that the event consumer processes these events correctly. Use tools like Postman for testing API endpoints and RabbitMQ management tools to monitor queues.
10. Deploying Your Application
Containerize your services using Docker for consistent deployments across different environments.
Dockerizing EventProducer:
- Add a
Dockerfileto theEventProducerproject:
FROM mcr.microsoft.com/dotnet/aspnet:5.0 AS base
WORKDIR /app
EXPOSE 80

FROM mcr.microsoft.com/dotnet/sdk:5.0 AS build
WORKDIR /src
COPY ["EventProducer/EventProducer.csproj", "EventProducer/"]
RUN dotnet restore "EventProducer/EventProducer.csproj"
COPY . .
WORKDIR "/src/EventProducer"
RUN dotnet build "EventProducer.csproj" -c Release -o /app/build

FROM build AS publish
RUN dotnet publish "EventProducer.csproj" -c Release -o /app/publish

FROM base AS final
WORKDIR /app
COPY --from=publish /app/publish .
ENTRYPOINT ["dotnet", "EventProducer.dll"]
- Build and run the Docker image:
docker build -t eventproducer .
docker run -d -p 8080:80 --name eventproducer eventproducer
11. Conclusion
Implementing Event-Driven Architecture in .NET Core involves creating event producers and consumers that interact through a message broker. This approach enhances scalability, responsiveness, and decoupling in your applications.
By following this tutorial, you now have the foundational knowledge to build event-driven systems using .NET Core. Continue exploring and refining your implementation to fully leverage the power of event-driven architecture.